Welcome

I love to create handmade gifts for every occasion. Look around and leave me a comment or two. I love comments!

Translate

Tuesday, December 21, 2010

Gift bags and Tags

I decided to make all of my own tags this Christmas. In addition I decorated these gift bags and made the gift inside. I have already posted the gifts inside but I wanted to show you the gift bags and tags!
I used plain white lunch bags and stamped in New England Ivy and Tulip. The Merry Christmas stamp is something I picked up several years ago on a clearance table at a local craft store. Same for the metal ribbon slides. I forgot I even had them until yesterday when I cleaned up my disaster craft room. They look great! The paper and black ribbon are from Close To My Heart. I cut a 3 inch circle and a 3 1/4 inch scallop on my new circut. Love that machine! I stampded To: and From: on the back of the tag. Looks cute without the writing on the front. The photo below is the first attempt and I decided I liked them better before I wrote on them.

Mom's Birthday Card


December 22nd is my Mother's Birthday. I have always tried to make it NOT look like Christmas. When she was a child her Birthday always got celebrated with Christmas. When I was a child I felt bad about that and so as an adult I always wrap her presents in Birthday paper and give a Birthday card!
I used CTMH printed cardstock from the Level 1 Scrapbooking Kit called Enchanted. I love purple (Smokey Plum) and green (Garden Green) together. I added lots of spearkles and pearls. Not sure you can really see them in the photo.
This card requires a lot of stamp sets. Luckly I have many, many sets to choose from. I have made several of these funky folded cards and I always use Make a Wish (B1312) and another with no name (D1400) that I got in a kit last summer on the clearance sale. The flower border is B1349 also from a Workshop On The Go Kit Splendor. I also used Paisley Praise D1414, Save the Date and Month by Month C1425. I used two ink colors, Garden Green and Smokey Plum. I added Bitty Sparkles, colored sparkles from Blue & green and Red, Pink and Purple Assorments.
If you want to use many of your stamps try this Funky Folded Card! It was a blast to create!!

Friday, November 26, 2010

Black Purse

This is a pattern I PURCHASED last summer from Becky Roberts. Her blog is called inkingidaho. She is a SU demonstrator. I think was $5.00. It wasn't very hard except getting the nerve up to try it! I think it is really cute!
I might give a purse with a Birthday card or Thank you Card. I used black cardstock and pewter brads from Close to My Heart. The stitching is done with a white colored pencil. The instructions were to use a gel pen but mine dried up long ago. I thought a silver sharpie might look cool too. I put velcro under the brad so the purse can open and shut. I also used Terrifically Tacky Tape for a strong bond. I have found that some boxes I made using Tomow don't stay together well. It holds a fair amount of candy. It might also be cute sitting on a desk at work instead of a candy dish.

Vineberry Birthday card

I was looking for card ideas today and I remembered how much I liked a Heart 2 Heart color challenge from last summer. I decided that Vineberry and Creme Brulee would be my colors for today. I hadn't used the Creative Bascis Emporium Papers and pulled them out for this card.
The card is kind of like the gift card holder I learned how to make from Teresa Black. but instead of a gift card I attached a strip of card stock and put a big flower on it. I used the stamp set Something Splendid to make the flower. It was the August SOM.
Here it is all the way open. I attached the strip of cardstock under the paper so it can't be seen from the back. I really like how it turned out. I am going to give it to a friend tonight at dinner. It is her Birthday! I hope she likes it.

Thursday, November 25, 2010

Magnifique Thanks Card


I finally have some time to create an entry for the Heart 2 Heart Challenge this week. The theme is Thank You. I LOVE the peacock paper and so I started there. I used the stamp set that comes with the Magnifique workshop kit B1358 Heart to Heart along with Unity C1422 and Circle of Love D1438. I distressed in Chocolate, stamped in Pacifica and Chocolate. I created the Friends Forever plaque using Dimentional Elements Booksmart. I sponged on some Bamboo and then stamped with Chocolate. Small brads are Close To My Heart Antiqued Copper.

Birthday Cards

I made this a while ago and never got the photos taken. They are OK but, not my best work. Sometimes I "got it" and sometimes I don't! This was a don't kind of night. What do you think?

Wednesday, November 24, 2010

Double Slider Card


Here is another card I copied from the Stampgoddess Teresa Black who is so Fabulously Artsy! This is just the outside becasue my camera battery died just as I went to take the picture of the two sliders. I will post the second picture later today/tonight after my stupid battery gets charged. Does anyone else have a battery that does not hold a charge? Maybe it is time for a new one. The camera is only one year old. Seems like I haven't had it long enough to wear it out! More to follow!
Update: Phot of the sliders all the way out. This is a fun card and no one expects the top slider! ENJOY!

Christmas Presents


These are going to be Christmas Gifts for some of my friends. I used CTMH products except for the blue ribbon, it is from Offray. I picked it up at a local craft store, Roberts. I am having a lot of fun making these Sticky Note Holders different each time. If you have a question leave a comment and your e-mail address and I will respond ASAP.

Tuesday, November 23, 2010

Gift Card Holder Christmas card

This is the giftcard holder I made after watching Teresa Black's Ustream video. I copied it almost exactly. It turned out great and Hubby and my kid both were surprised that it had something inside. I usually leave them black. NOT SO with this one! I used all Close to My Heart products except for the punch on the edge. It is made by Fiskars. I want to make several of these for my sisters. I usually sent them a gift card and this will be a much better presentation!


Jingle Gift Enclosures with Nuggets

This is a box of six 3 by 3 cards with envelopes. I made the box, cover, cards with envelopes and covered the three nuggets all using the Level 2 Jingle paper pack. All embellishments are from Close To My Heart. I recieved the instructions from my upline Jodi Peck. I have never met her but I am part of an online group and she sents us all information from time to time. I saw this a while ago and could not resist making it. this is the box without the cards. The cover is made using a page protector.


Monday, November 22, 2010

Thanksgiving Centerpiece


This is the Fall Centerpiece I taught for Creative University On Line back in August with Teresa Black. I am reposting it now that it is closer to Thanksgiving. Inside the bucket are rocks, fake acorns and Carmel Kisses. It is decorated on all sides so that it can be in the center of the table. If you are interested in watching how to make one go to Teresa Black's Ustream channel at http://www.ustream.tv/channel/fabulously-artsy.


Winter Arrived


We went to bed on Saturday night and the prediction was for a few inches of snow. This is about 10 inches! I think it is safe to say that winter has now arrived.

Sunday, November 14, 2010

Where have I been?

Sorry I haven't posted anything in such a long time. Teaching has been really hectic and I got a stomach bug and it put me flat in bed for five days! It was so HORRIBLE. I cried because I thought I was going to die, then I cried becasue I realized I wasn't going to die! I finally have gotten better and I am SO looking forward to an entire week off before Thanksgiving. I hope to craft all day everyday and post something great each evening! Wish me luck!

Six More Mistletoe Cards

I am teaching another card class this week. We are making six more cards using the Mistletoe paper pack. I started with the pattern for the topstich kit and modified it a bit. . I really like this candy cane looking paper. I hope the workshop goes well. If you are interested in making these yourself let me know I can order the paper and give you some instructions.

Monday, October 18, 2010

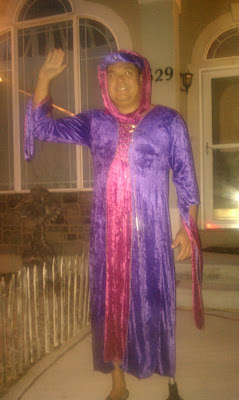
Embaress your teen? Check this Dad out!


Show this blog to your teens and they will thank GOD you are not this crazy! Threaten! Warn! Hope it never comes to this!

Tuesday, October 5, 2010

Mistletoe Workshop Cards


These are the cards I made for the Mistletoe Workshop Wednesday October 6, 2010. If you miss the workshop you can purchase the kit online or call me and I will order it for you. It includes all the instructions. If you need help let me know. If you want to have your own workshop get a couple of friends together and I will come and help you every step of the way.

Monday, October 4, 2010

Fall Candle Centerpiece

This centerpiece was a gift for a friend's daughter who is getting married next weekend. I really had to rush the photo session and didn't get a very good shot. the candles are decorated with images stamped on tissue paper. Then with a heat gun I melted the wax a bit and the wax absorbed into the tissue paper. They look better than it sounds. I want to make more of these for Christmas so perhaps I will get some better photos then.

Sunday, October 3, 2010

Get Well Michelle


My dear friend Michelle took a little tumble with her Hubby on the Harley Ride last weekend. She now needs to have surgery on her foot/ankle. I feel so terrible. My husband and I took her and her husband dinner on Friday. I wanted to make her a get well card too. I copied a card I got from the Fabulously Artsy Teresa Black. It is the prettiest card I have ever seen. Now it is the prettiest card I have ever made. Thanks Teresa. Get Well Michelle!
If you would like to make this card Teresa has a tutorial class on Ustream. It is easier than it looks.

Monday, September 13, 2010

Sticky Note Holders

I made this Sticky Note Holder after watching Teresa Black's Ustream CU-OL class. Her's was way fancier but she made me think. This is the result. I think it would be perfect for a teenage Nephew.


I went to the U Of U Football game last Saturday and I thought up these. They remind me of a school sweater.


Funky Folded Birthday card


I know I just posted one of these cards but this one is more muted and I like it better. what do you think?
This is the Sticky Note Holder I made to go with the card above.

Wednesday, September 8, 2010

Funky Folded Card


I found this pattern on the internet last spring. The first one took a LONG time. I experimented with the design over the weekend at our friend's cabin. This one was faster but still takes some time to make. I wouldn't make this for everyone's birthday but it does make a big impact and gets a terrific response. Sorry about the shadows. Due to the funky folds and the primative location it was impossible to get a shadowless picture. Let me know if you are interested in a ustream class on this card. I am thinking about doing a couple of class in the next couple of weeks if someone is interested!

Monday, August 30, 2010

Sticky Note Holder Tutorial

Sticky Note Holder With Pen


Supplies:
Cardstock (either 12 x 12 or 8 ½ x 11) I used CTMH Level 1 Scrapbook kit pattered cardstock.
Standard size hole punch
Circle punch 5/8 inch (mine is by Fiskars)
1 sticky note pad 3 x 3
Strong adhesive (I used Terrifically Tacky Tape)
Ribbon to match your cardstock
Pen
Embellishments
Directions:
Cut cardstock 8 ¼ by 3 ¼ inches
Score at 3 1/8, 3 ½, 6 5/8, 7


Create two holes for the ribbon.
One side is longer than the other. On the longer side measure in ¾ of an inch on center and using the regular hole punch make the first hole.
Next, on the short side with 5/8 circle punch measure in ¼ inch on center and punch the second hole.


Cut a 3 inch piece of ribbon for the pen loop.
NOTE: You may need to adjust the length of ribbon based on the pen you intend to use. My pen has a larger barrel with a grip surface that doesn’t slide easily. Test before you secure the ribbon with adhesive.
Fold Ribbon in half and insert loop through the smaller hole. Make sure the ends of the ribbon are on the back side.

Make sure the pen will fit through the loop. Then secure the ribbon with Terrifically Tacky Tape or other strong adhesive.


Next, attach the 3 x 3 note pad with more Terrifically Tacky Tape on the back of the note pad.


Make sure the ribbon is lining up so the pen can be inserted easily. Test it one more time. Make adjustment to the ribbon as necessary.
Now get out the embellishments and make it sparkle and shine.


Here are the books I have made.

If you have questions feel free to e-mail me at bobieglassett@gmail.com or leave a comment/question on this post.
I hope you have as much fun making these little books as I have. Send me photos of your creations or leave me a link to your blog.
Thanks,
Bobie